🧭Developer overview
What you can build on Shippified, how the pieces connect, and a five-minute first request.
- Written for
- Developers integrating with Shippified
- Applies to
- All plans
- Deprecated
- + Deprecated
Shippified collects orders from Discord monitor bots and retailer emails, merges them into one order list, and tracks each order through to delivery. The dashboard at shippified.net runs on the same HTTP API documented here, so anything the dashboard does, your code can do: read and create orders, record sale prices, connect intake sources, write parsing templates, and get a signed HTTP call when something changes.
This section explains the concepts and walks through each resource. For every endpoint and schema, generated straight from the live OpenAPI spec, use the API reference pages in the sidebar (linked below).
What you can build on
Surface | Direction | What it is | Page |
|---|---|---|---|
REST API | You call Shippified | JSON over HTTPS at | |
Authentication | You call Shippified | Bearer tokens on every request: long-lived API keys ( | |
Discord-format intake | A bot calls Shippified | One URL per bot that accepts the same JSON as a Discord webhook. Anything that can post to Discord can create orders. | |
Email intake | Mail reaches Shippified | Upload a raw email yourself, let Shippified poll a mailbox (IMAP, Gmail, Microsoft), or forward mail to a Shippified address. | |
Custom templates | You call Shippified | Teach the parser a new bot or email: match rules, field mappings, live previews and a full dry run. | |
Outbound webhooks | Shippified calls you | Signed | |
TypeScript SDK | Library |
| |
MCP server | Library |
| |
OpenAPI spec | Reference | OpenAPI 3.1 at |
How the pieces fit
Discord monitor ──POST──▶ /api/webhooks/discord/:handle/:slug ──┐
Mailbox poll / forwarding / POST /api/email/import ─────────────┼─▶ parser ─▶ orders ─▶ outbound webhooks
Your code ──POST /api/orders ───────────────────────────────────┘               │
                                                                                ▼
                                      REST API, SDK and MCP read and update orders
                                      Background tracker refreshes in-flight packages
Every incoming message goes through one intake pipeline:
Check. For email, the source's allowed-senders list is applied to the sender (for a manual forward, the original sender only when you forwarded it from your own address), and a message Shippified has already seen (same
Message-ID) is skipped.Parse. The message is matched against your custom templates and the built-in shapes, and order fields are pulled out of it.
Merge or create. If an order with the same order number exists, the message is merged into it. Otherwise a new order is created.
Notify. Matching webhook events fire, and a status card is posted to your Discord updates webhook if you set one.
An order's status is one of ordered, shipped, delivered, canceled or issue. It is always worked out by Shippified from the messages and carrier data, never set by hand, and it only moves forward. See Orders → Status.
Make your first request
1. Create an API key
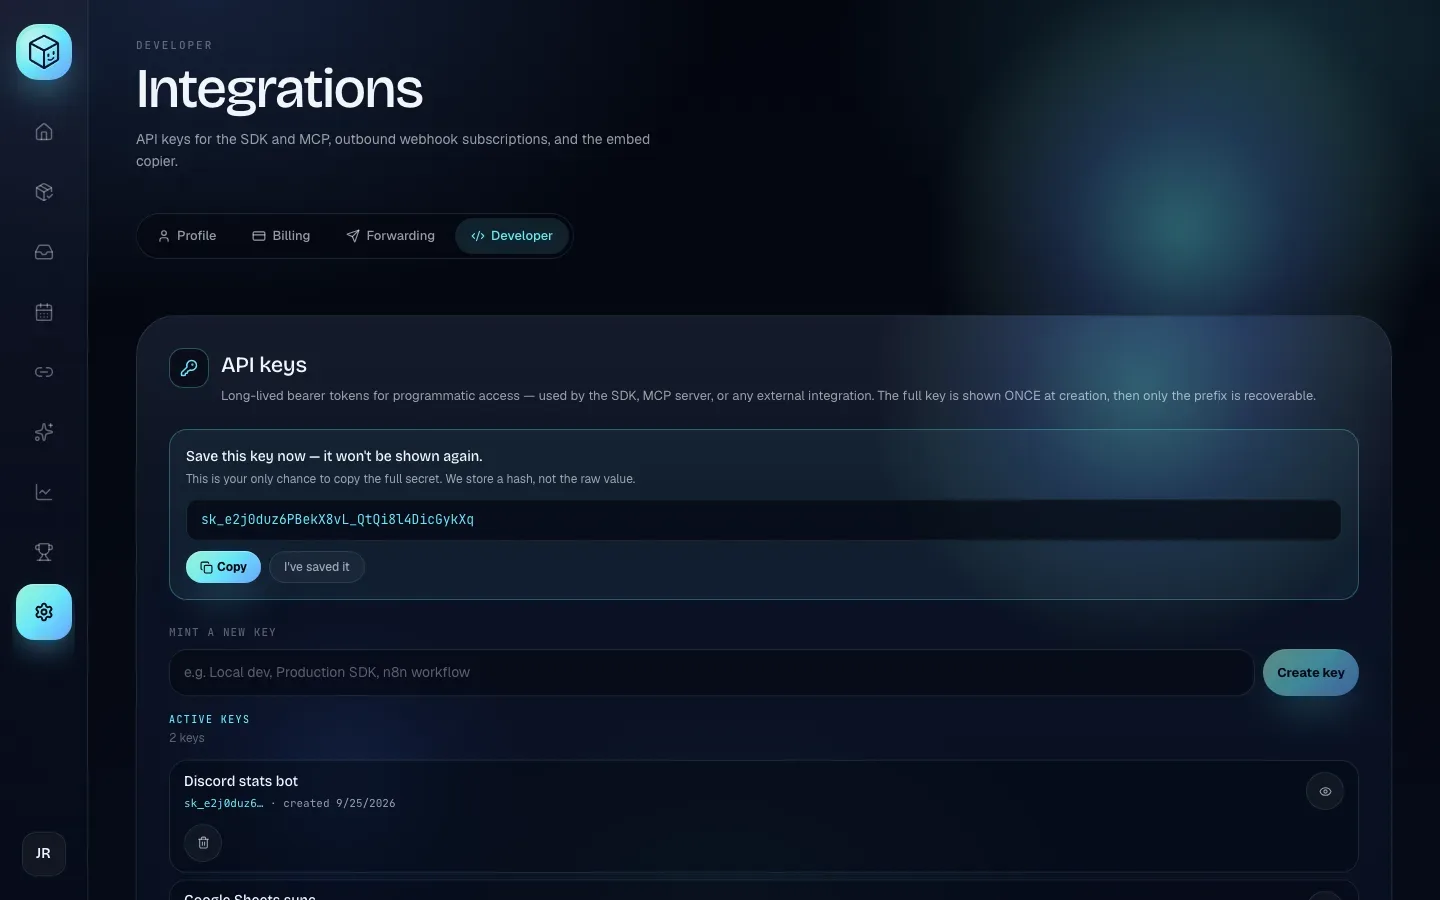
In the dashboard, open Settings, then the Developer tab. Type a name under Mint a new key (for example Local dev) and click Create key. Copy the key that appears, then click I've saved it. The key is shown only this once.
2. Put it in an environment variable
Keep the key out of your source code:
export SHIPPIFIED_API_KEY="sk_..."3. List your five most recent orders
- curl
- TypeScript SDK
- MCP
curl -s "https://shippified.net/api/orders?limit=5" \
  -H "Authorization: Bearer $SHIPPIFIED_API_KEY"
import { ShippifiedClient } from "shippified-sdk";
const shippified = new ShippifiedClient({ token: process.env.SHIPPIFIED_API_KEY });
const page = await shippified.orders.list({ limit: 5 });
console.log(page.items.map((o) => `${o.id} ${o.status} ${o.itemSummary}`));Ask your MCP client: "List my five most recent Shippified orders." It calls the list_orders tool with limit: 5.
You get the standard list envelope:
{
  "items": [ { "id": "ord_mpvu9uim_aeh5t", "status": "shipped", "itemSummary": "Example Console Bundle", "…": "…" } ],
  "total": 142,
  "limit": 5,
  "offset": 0,
  "hasMore": true
}
A 401 {"error": "Not authenticated"} means the header is missing or the key is wrong or revoked.
4. Check the service and the spec
Neither call needs a token:
curl -s https://shippified.net/api/healthz
curl -s https://shippified.net/api/openapi.json | jq '.info'
If you're setting Shippified up as a reseller rather than building against it, start with the quickstart guide instead.
API reference
The per-endpoint reference is generated from https://shippified.net/api/openapi.json and grouped by area. Each page lists every operation with its parameters, request body and response schema.
The rest of the reference: State, Subscriptions (recurring costs), Insights, Shares, Embed Copier, Discord, Settings, Billing and Public. The API's own introduction is at Shippified API.
The reference lists shapes; the narrative pages explain behaviour a spec can't express, such as merge rules, fill-missing-only edits, and webhook signing and retry details. Read both.